使用 n8n 串接 Perplexity AI:透過 HTTP Request 打造 AI 工具
在 n8n 的官方節點庫中,目前並沒有直接支援 Perplexity AI 的專屬節點。不過,這並不妨礙我們將 Perplexity AI 強大的能力整合到自動化流程中。
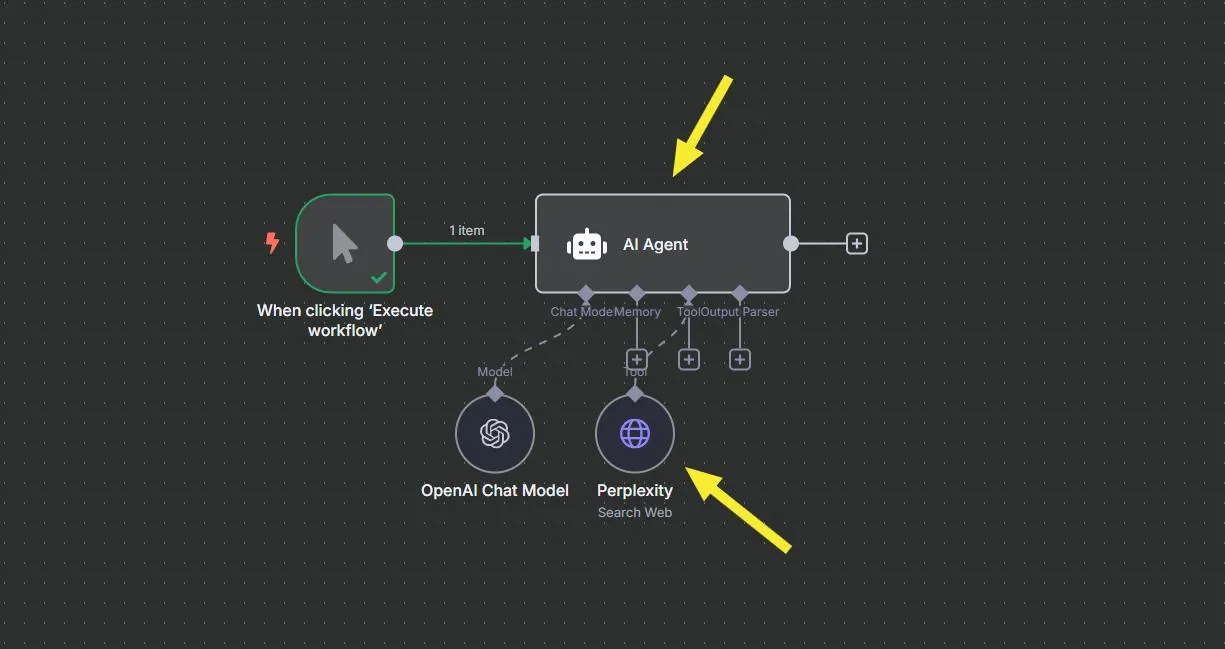
我通常會利用 n8n 的 HTTP Request 節點來串接 Perplexity AI,並將其作為 AI Agent 的一個工具(Tool)來運用。這種方式讓 n8n 能夠靈活地與各種未提供官方節點的服務進行互動。
取得 Perplexity AI API Key 步驟
要開始使用 Perplexity AI,您需要先取得一個 API Key。請依照以下步驟操作:
- 前往 Perplexity 官方網站。
- 在帳戶設定頁面中,找到「API 金鑰」區塊,並點擊「創建鍵」。
- 請務必妥善保存您新建立的 API Key,後續設定時會用到。
建立 n8n 節點:AI Agent 與 HTTP Request
在 n8n 工作流程中,您需要建立以下兩個核心節點來實現與 Perplexity AI 的串接:
- AI Agent 節點
- HTTP Request 節點
設定 HTTP Request 節點以呼叫 Perplexity API
現在,我們將設定 HTTP Request 節點,讓它能夠正確地呼叫 Perplexity AI 的 API。
- Method (方法): 設定為
POST。 - URL (網址): 輸入 Perplexity AI 的聊天完成 API 端點:
https://api.perplexity.ai/chat/completions。 - Authentication (認證): 選擇
Generic Credential Type。 - Generic Auth Type (通用認證類型): 選擇
Header Auth。 - Header Auth (標頭認證): 點擊「Create new credential」建立新的憑證。
- Name (名稱): 輸入
Authorization。 - Value (值): 輸入
Bearer Your_Perplexity_API_KEY。請注意,Bearer後面需要一個空格,接著貼上您之前取得的 Perplexity API Key。
- Name (名稱): 輸入
需要協助?加入 Discord 社群尋求支援
如果您在設定過程中遇到任何問題或需要進一步的協助,歡迎加入我的 Discord 社群。